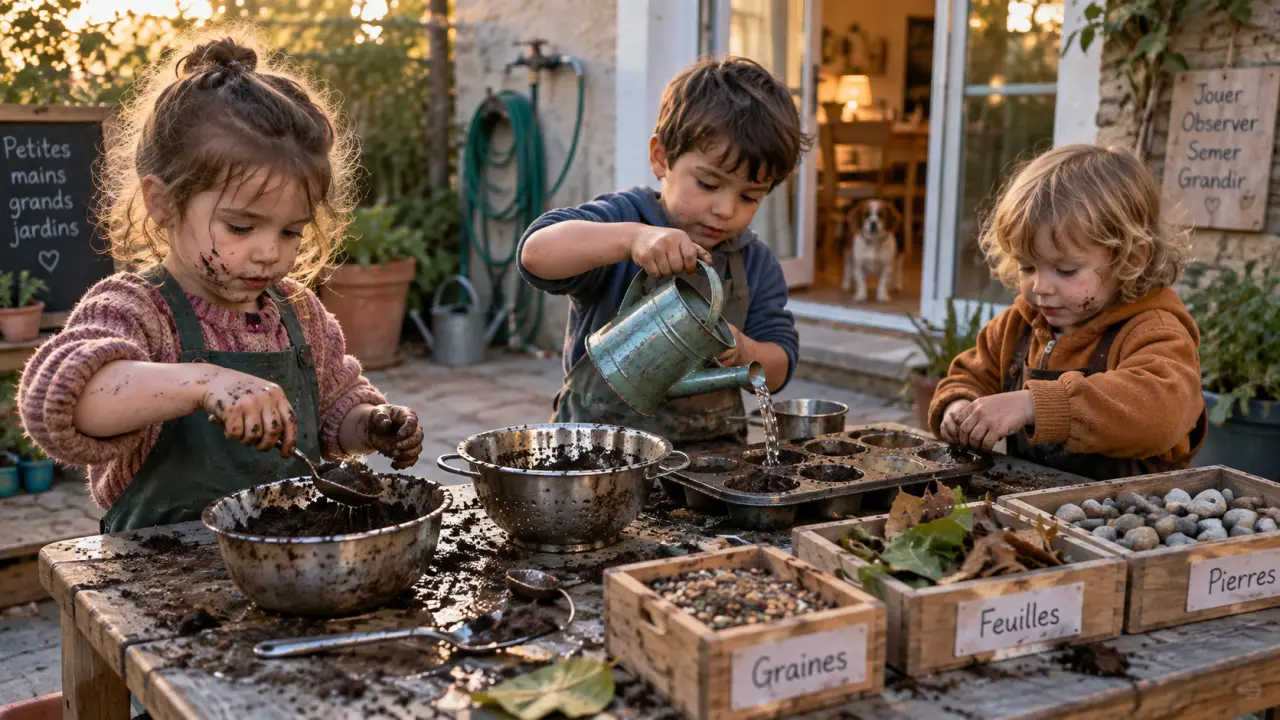
A DIY mud kitchen gives children a simple place to mix, pour, scoop, and invent outdoors. You do not need a real sink or an expensive build. A stable child-sized surface, a few second-hand utensils, soil, and a small amount of water are enough to get started.
Start with the right layout, not a complicated build
A mud kitchen is an outdoor pretend-play station where natural materials become “recipes.” Children can make leaf soup, pebble pies, or sandcakes while developing imaginative, sensory, and open-ended play. The most useful setup is one children can reach and use independently. It does not need to look like a miniature indoor kitchen.
Choose a practical location
Set the station on level ground, ideally close to a hose, outdoor tap, or back door. This keeps refilling and tidying manageable. A yard, patio, deck, or fence line can work well. On a balcony, use a waterproof tray or shallow bin to contain the mess, and never throw loose soil over the edge.
Keep the area away from steps, driveways, pools, and delicate planting beds. A defined play zone also makes it easier for children to understand where mixing belongs. If the station sits on a patio, place a ground mat or tray underneath it to catch spills and muddy splashes.
Make the work surface fit the child
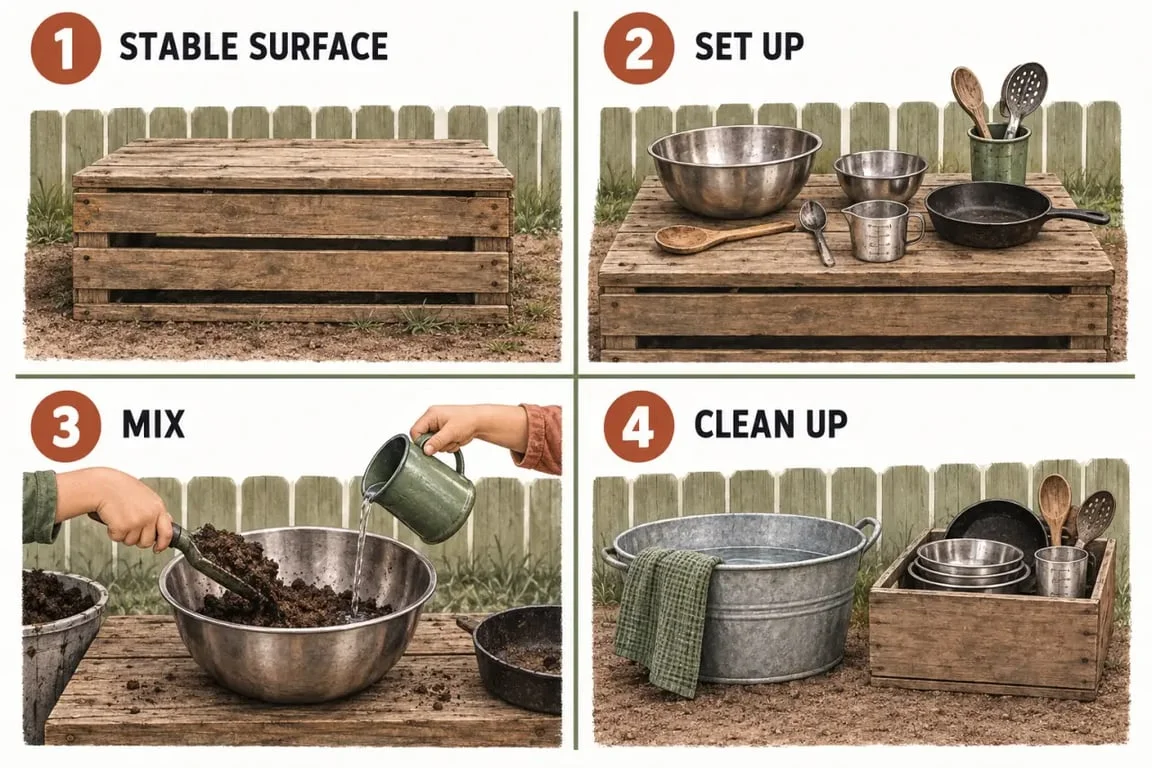
A child-sized table, a low bench, an old chest of drawers, or sturdy crates topped with a board can all provide a useful base. Aim for a worktop around elbow height when the child is standing. This detail matters more than decorative knobs or a working sink. Children can stir without reaching up and carry bowls without lifting them over their shoulders.
Keep the main tools within one easy turning radius. When water, soil, utensils, and storage are close together, children spend less time asking for help and can follow their own play sequence: collect, combine, stir, serve, then reset. This compact action zone also limits muddy trips across the garden because each material has a clear place.
Pick a DIY mud kitchen style for your budget and space
| Build idea | Best for | What you need |
|---|---|---|
| No-build tray station | Balconies and small patios | Low table, large tray, tubs, utensils |
| Second-hand furniture makeover | Fast, low-cost garden setup | Old table or drawers, hooks, storage bins |
| Pallet or scaffold-board unit | A more permanent outdoor kitchen | Sound reclaimed timber, screws, shelf boards |
| Fence-mounted station | Narrow outdoor spaces | Board, secure hooks, hanging containers |
A simple second-hand setup can cost around $50 when you reuse a table, bowls, and containers. A beginner DIY mud kitchen with more structure may reach $100. These figures depend on what you already have, so check second-hand shops, storage areas, and unused garden equipment before buying materials.
Before using reclaimed pallet wood or old furniture, check that it is sound and free from splinters, peeling paint, sharp fixings, and unknown chemical treatments. Sand rough edges and secure every component so it cannot tip or pull away. A fence-mounted design also needs firmly attached hooks and containers that children cannot easily dislodge.
Stock the station with loose parts children can transform
You do not need toy food. The appeal comes from ordinary objects that can become many different things. Start with a small selection, then rotate materials to renew interest without overcrowding the work surface.
- Metal or sturdy plastic bowls, muffin tins, jugs, spoons, ladles, and sieves
- A child-sized watering can, scoop, funnel, and measuring cups
- Soil, sand, smooth pebbles, leaves, pinecones, petals, grass, and herbs
- Crates, baskets, hooks, and labelled tubs for simple storage
Choose tools that are easy to hold and large enough not to become a choking hazard for the children using the station. Avoid fragile containers, sharp edges, and items with loose parts that can detach. The aim is to provide loose parts that children can sort, fill, combine, and repurpose in different ways.
Refresh ingredients with the seasons
In spring, add petals and fresh leaves. In summer, offer water and herbs. In fall, use acorns, seed heads, and colourful leaves. In winter, try ice pieces, evergreen cuttings, and dry natural materials. Seasonal changes give children new textures and colours to explore without requiring a new build.
Avoid plants or berries you cannot identify, as well as anything thorny, mouldy, or treated with pesticides. Natural ingredients are for play, not eating, so supervise young children closely. Remove anything that becomes dirty, decomposed, or difficult to identify.
Use water safely and make clean-up routine
Water makes a mud kitchen more engaging, but it should remain shallow and supervised. Fill a small tub, dispenser, or watering can only for the play session. Do not leave standing water behind, especially around young children. Even a small amount can create a risk if a child is left unsupervised.
A hose may be convenient, but it should not be left running or used as a high-pressure toy. Give children a limited amount of water in a watering can or small container instead. This helps control the mess and makes it easier to see how much water is available.
Finish with a two-minute reset
Build clean-up into the game. Ask children to tip away water, return tools to hooks or bins, and rinse bowls with a watering can or hose. Leave utensils upside down to dry, brush loose mud from the surface, and cover or move lightweight items before rain.
This end-of-play routine prevents stagnant water, keeps tools easier to find, and makes the DIY mud kitchen ready for the next session. Check the station regularly for loose screws, splinters, unstable boards, or damaged containers, especially after bad weather.
Three details that prevent common mud kitchen problems
- Do not overfill it. Too many tools can overwhelm children and scatter quickly. Begin with a bowl, spoon, jug, scoop, and one or two containers. Add more only when the basic setup feels manageable.
- Give mud a boundary. A tray, ground mat, or defined patch of soil shows where mixing belongs, particularly on a patio. It also reduces the amount of mud carried into the house.
- Plan storage before decorating. Hooks for ladles and baskets for loose parts keep the station usable through changing weather. Storage should be easy for children to reach and simple to reset.
The most successful DIY mud kitchen is not the most polished one. It is stable, reachable, safe to supervise, and easy to reset. With a suitable surface, a few reusable tools, shallow water, and natural materials, children can turn soil and water into their own outdoor play space.
{“@type”:”Article”,”@context”:”https://schema.org”,”headline”:”Build a DIY Mud Kitchen That Works in Small Outdoor Spaces”,”inLanguage”:”en-US”,”description”:”A DIY mud kitchen gives children a simple place to mix, pour, scoop, and invent outdoors. You do not need a real sink or an expensive build. A stable child-sized surface, a few…”}
Related guides to continue
To build a stronger understanding of this topic, continue with these related guides from the same site. They cover nearby decisions, maintenance points and practical details that often influence the final result.