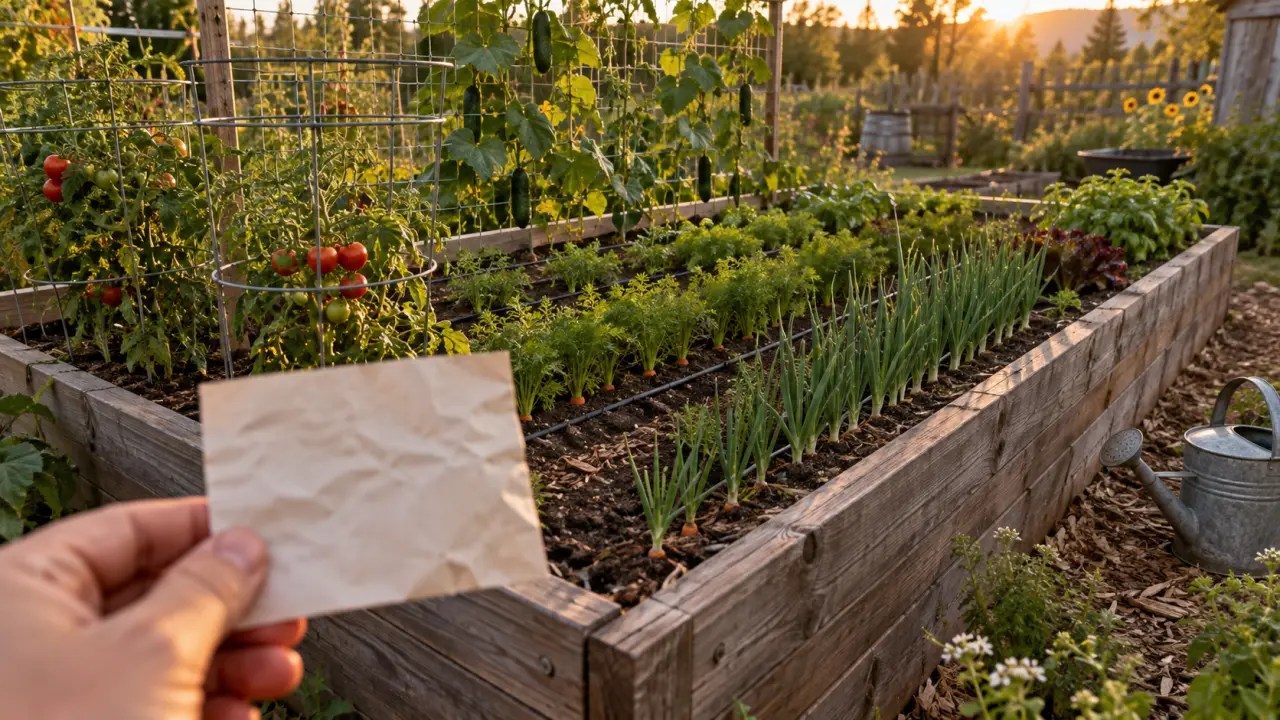
A productive raised bed starts with a plan, not a shopping list. A clear layout shows where each crop goes, how much space it needs, and which plants require support. For a first vegetable garden, a 4×8-foot bed offers room for variety while remaining manageable from every side.
Start with a bed size that works from every side
Bed width determines whether you can weed, sow, and harvest without stepping on the soil. Keep a bed no wider than four feet when you can reach it from both long sides. This protects the loose growing area that roots need and reduces soil compaction. A 2×4 or 2×8 bed works well on a patio, in a narrow side yard, or for gardeners who want a smaller, focused crop selection.
| Bed size | Best use | Planning advantage |
|---|---|---|
| 2×4 feet | Herbs, salad leaves, radishes | Easy first project with quick harvests |
| 2×8 feet | Salad garden or trellised peas | Fits a narrow space with a clear planting line |
| 4×4 feet | Mixed vegetables for one or two people | Accessible from all sides |
| 4×8 feet | Grocery-list garden or family favourites | Room for tall crops, roots, greens, and herbs |
Choose a site with six to eight hours of daily sunlight for fruiting vegetables such as tomatoes, peppers, beans, and cucumbers. Raised beds are useful over compacted, stony, wet, or poor ground because you control the soil mix and improve drainage. They can also work on hard surfaces when the structure and growing medium are suitable. Leave enough space around the frame to carry compost, water plants, and harvest from every side.
Map the light, supports, and access before adding plants
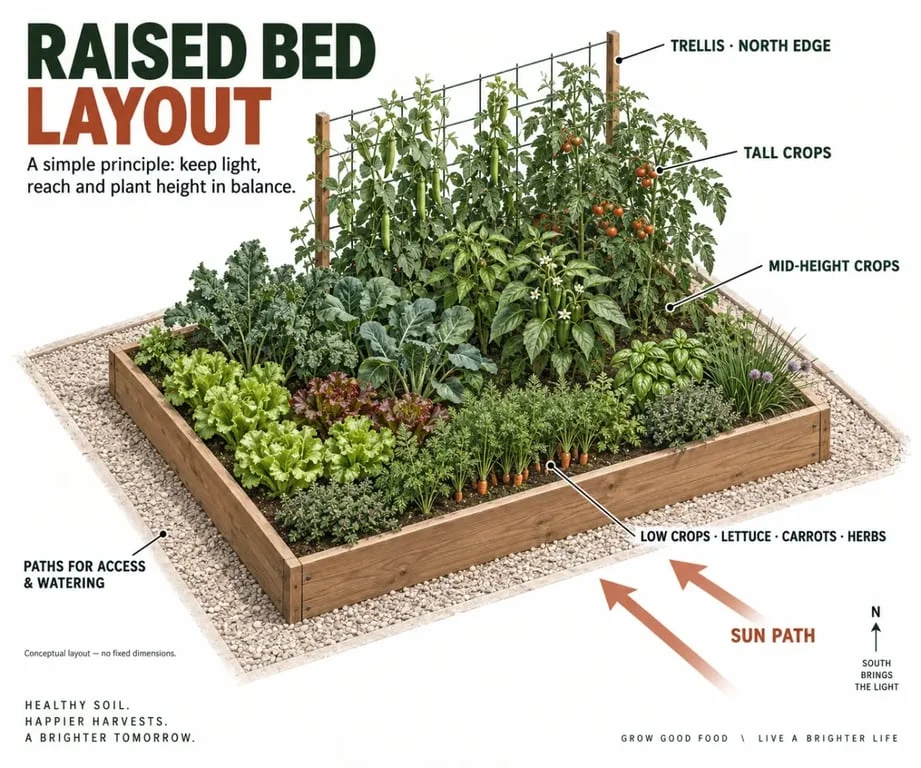
When planning a raised bed, consider sunlight, plant height, and your daily route through the garden. Put a trellis on the north side where possible, so climbing peas, beans, and cucumbers are less likely to shade shorter crops. Tomato cages should also go in before planting, rather than being pushed around mature stems later in the season.
Use height as your first placement rule
Arrange tall plants at the back or north edge, medium-height plants through the centre, and low crops near the south edge. Tomatoes, trellised beans, and zinnias can create a vertical screen, while lettuce, carrots, onions, and herbs benefit from the brighter foreground. Check the mature height and width on the seed packet or plant tag instead of judging a young transplant by its current size.
Access is part of the layout. If you cannot comfortably reach a plant with a watering can, basket, or pair of pruners, it may be neglected during the busiest part of summer. Plan the route you will use for watering and harvesting first. Then position the bed, trellis, and nearby compost supply around that routine. This approach also helps gardeners who want to reduce bending or walking on the soil.
Plan water into the layout
Closely planted crops can shade the soil and reduce weed pressure, but they also compete for moisture. Water at soil level and mulch bare patches once plants are established. Group crops with similar needs where practical. Thirsty cucumbers and tomatoes should stay near your easiest watering route, while herbs often prefer not to sit in constantly wet soil.
A practical 4×8 layout in eight rows
Divide a 4×8 bed into eight crosswise rows, each one foot deep. This creates a useful visual framework without forcing every crop into identical spacing. The following plan suits a household that wants regular ingredients for salads and simple meals.
- North edge: two cucumber plants on a trellis.
- Row 2: two tomato plants in cages, with basil in open pockets.
- Row 3: three pepper plants, spaced according to their mature width.
- Row 4: two rows of onions.
- Rows 5 and 6: two rows of root vegetables, such as carrots or radishes.
- Row 7: a block of lettuce or other leafy greens.
- South edge: parsley, compact herbs, or nasturtiums trailing over the edge.
This example includes two tomato plants, three pepper plants, two cucumber plants, two rows of onions, and two rows of root vegetables. It is a starting point rather than a fixed prescription. Replace any crop you rarely eat with one you will harvest often. A salsa-focused bed might give more space to peppers and tomatoes. A salad bed can prioritise lettuce, radishes, herbs, and cucumbers.
Use intensive planting without overcrowding
Square-foot gardening uses one-foot by one-foot sections to organise intensive planting. It can make a small vegetable garden more productive, but the grid does not replace spacing guidance. Plant density must still reflect mature size, airflow, and the crop’s growth habit.
- Use close spacing for quick crops such as radishes and salad leaves.
- Give tomatoes, peppers, and squash the room stated on their labels.
- Thin direct-sown carrots and greens so the remaining plants can develop.
- Choose compact or bush varieties when growing cucumbers or squash in a small bed.
- Train suitable plants upward or over the bed edge instead of letting them cover neighbouring crops.
Add alyssum, marigolds, or nasturtiums in small gaps if you want flowers for pollinators and visual variety. Do not fill every inch at planting time. Young plants need room to expand, and good air circulation helps leaves dry after rain or watering. If a crop becomes too dense, remove weaker plants rather than allowing the whole bed to compete for light and moisture.
Keep the layout productive after the first harvest
A raised bed layout should change through the season. When peas or garlic are harvested, do not leave the space bare. Remove crop residue, add a layer of compost, water it in, and sow or transplant a replacement crop suited to the remaining growing season.
Fast greens, radishes, and bush beans are useful follow-up choices when warm weather remains. As temperatures cool, leafy greens and other frost-tolerant crops can replace summer vegetables. Keep a simple note of what grew where, especially if you have several beds. Rotating crop families from one bed to another the following season helps prevent the same demands from being placed on the same patch of soil.
The most useful raised bed layouts stay flexible. They respect sunlight and mature spacing, provide support early, and leave room for the crops your household actually uses. Start with a simple grid, then adjust it as you learn which vegetables fit your space, routine, and meals.
{“@type”:”Article”,”@context”:”https://schema.org”,”headline”:”A 4×8 Raised Bed Layout That Keeps Tall Crops From Shading Greens”,”inLanguage”:”en-US”,”description”:”A productive raised bed starts with a plan, not a shopping list. A clear layout shows where each crop goes, how much space it needs, and which plants require support. For a first…”}
Related guides to continue
To build a stronger understanding of this topic, continue with these related guides from the same site. They cover nearby decisions, maintenance points and practical details that often influence the final result.